Check out the video below for a guide on how to fit your pedals and handlebars when your bike is delivered via our home delivery service! Subtitles/Closed Captions are available, or if you’d prefer written instructions please keep scrolling.
- When fitting pedals – the right pedal turns clockwise / the left pedal turns anti-clockwise.
- Please make sure pedals are tight before riding.
- When adjusting the handlebars – stand over your front wheel looking down the bike to make sure they are straight.
To complete your bike setup, you will need to use the supplied pedal spanner and multi-tool.
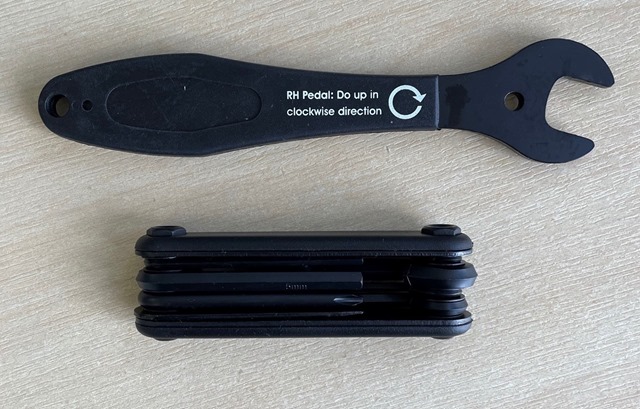
How to fit your pedals:
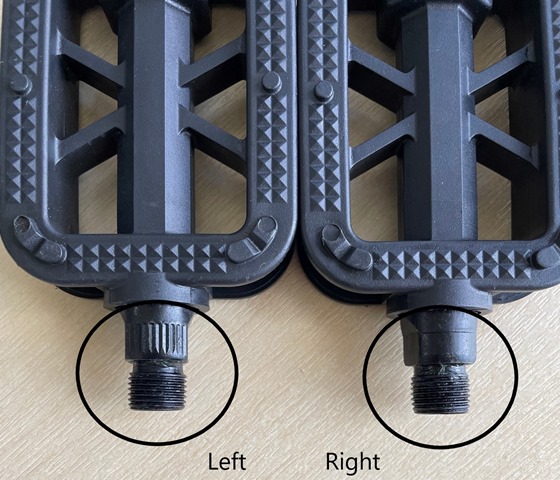
The pedals if supplied with the bike, will have an L or an R stamped on the end of the thread to denote which is which. The Left pedal will also have a serrated collar as shown in the image above.
The right pedal (i) goes into the crank-arm on the drive-side (ii) (that’s the side with the chain on) and is turned in a clockwise direction.
The left pedal (iii) goes into the crank-arm on the non-drive side (iv) of the bike, to do this turn it anti-clockwise.
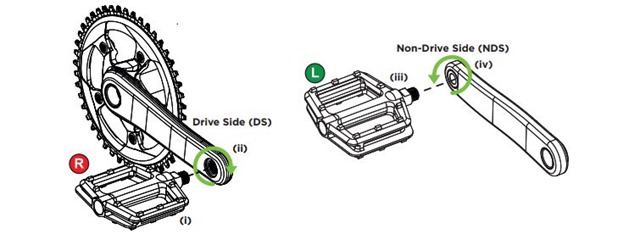
Once they are finger tight you can then use the pedal spanner to tighten them further.
How to fit your handlebars:
You will need to use a multi-tool for this job, select the right size, likely to be the 4mm for 4 bolt stems and the 6mm for 2 bolt stems.
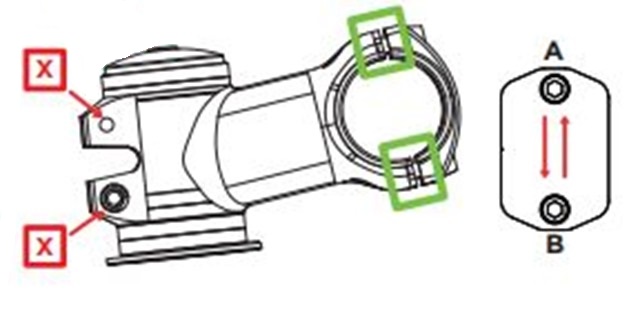
Loosen the stem bolts (depicted in the below by X) and rotate the handlebars and stem so the front of the stem is directly inline with the frame of the bike. Then tighten the bolts from the top down using the multi-tool provided.
Once done, loosen all stem faceplate bolts fully and place them to one side.
Lift the handlebar up towards the stem, ensuring the brake and gear cables are not twisted. If they are, flip, twist or rotate the handlebars so the cables run freely from the frame to the handlebars.
Align the centre of the handlebars with the centre of the stem. As a way of making sure the handlebars are the correct way, the brake levers should be facing away from the stem.
Rotate the handlebars so the brake levers are approximately at an angle of 30-45 degrees from the ground. You can adjust to ensure the fit is comfortable. If you are adjusting a road or gravel bike, you can start by placing the tops of the ‘hoods’ parallel to the ground or slightly upwards.
Once this is complete, fit the stem plate and bolts. Tighten them evenly by hand, using the order shown below (a,b,c,d).

Once hand tight, using the same tightening order, the bolts should be tightened individually using the multi-tool provided. (Each manufacturer/bike will have their own recommended specification). The stem faceplate should be evenly spaced at the top and bottom once tightened.
If you are in any doubt or have a question, please do not hesitate to call us on 020 4506 3856 Mon-Fri 9am-430pm and one of our friendly experts can assist you.

