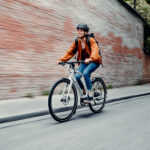

Bike lights are useful for many reasons, not just the obvious ones. But whether you are commuting on the road, training, hitting the trails or just out for a quick spin, you need to choose the bike lights that are best suited to your needs.
The Road Vehicles Lighting Regulations, first published in 1989, state that between the hours of sunset and sunrise, your bike must have working lights. This is defined as a white front light and a red rear light. Unlike other vehicles, bikes are not required to be lit up when the conditions seriously deteriorate during the day, but you will be putting yourself at risk if you do not. Lights are not just for seeing with – they also help you to be seen, including during the day with daylight running options to always keep you visible.
But how do you choose the right bike lights? We break down some key things to look out for in this guide.
Which bike lights do I need?
There are several factors to take into consideration when choosing your lights. For nighttime riding, as mentioned above, you will need a white front light and red rear bike light. But within that there are various things you should take into consideration:
- Beam pattern, what is best for where you will be riding?
- Runtime, will they last your journey?
- Is there just one mode, or are there different options?
- Charging, how do I take care of this, and how long will it take?
- What are lumens?
- How to attach your lights to your bike?
We’ll discuss each point in more detail below.

Which beam pattern is right for my journey?
When it comes to bike lights, understanding bicycle beam patterns is crucial for ensuring both safety and visibility during rides. The term “Beam pattern” refers to the way light is distributed and projected onto the road or trail from a bike light. Different beam patterns serve distinct purposes and are optimised for various cycling conditions.
One common type of bicycle beam pattern is the “spot” or “focused” beam. This beam pattern emits a concentrated, intense light forward in a narrow beam. Spot beams are particularly effective for illuminating distant objects on the road, providing a clear line of sight that helps cyclists anticipate and react to obstacles ahead. This type of beam pattern is commonly used for night rides on well-lit roads where the main concern is seeing far ahead and avoiding hazards.
Conversely, the “flood” or “wide” beam pattern spreads light over a larger area with less intensity. This pattern is especially useful for urban environments with varying lighting conditions, as it helps cyclists remain visible to pedestrians, motorists, and other cyclists from a wide angle. Flood beams are excellent for city commuting, enabling riders to navigate through traffic while also enhancing their lateral visibility.
In recent years, many bike lights have incorporated innovative technologies that allow cyclists to adjust the beam pattern according to their immediate needs. This adaptability between spot and flood modes offers a versatile solution, accommodating both open roads and urban settings. Cyclists can switch between these modes based on their surroundings and lighting conditions, enhancing their safety and overall cycling experience.
Mountain bike lights require beam patterns tailored to the challenges of off-road terrain. A unique consideration for mountain biking is the need for a versatile beam pattern that combines both focused and wide illumination. A “dual beam” approach has gained popularity among mountain bike lights, offering a blend of a strong spot beam for illuminating trail obstacles ahead and a wider flood beam to maintain peripheral visibility. This combination ensures that riders can navigate technical descents, sharp turns, and rocky paths with clarity while also staying aware of their surroundings. The adaptability of dual beam patterns significantly enhances the safety and performance of mountain biking adventures, making them an essential choice for riders who venture off-road.
When selecting a bike light, it’s important to consider the optimal beam pattern for your specific riding style and environment. Whether you’re a dedicated mountain biker tackling rugged trails or a city commuter navigating busy streets, choosing a bike light with a suitable beam pattern can significantly enhance your safety and visibility, making every ride more secure and enjoyable.
Bike Light Runtime: How long will my lights run for?
Ensuring sufficient bicycle light run time is a critical factor to consider when selecting your lighting setup, as it directly impacts your safety and convenience. Experiencing a loss of illumination before reaching your destination or completing your ride can be both frustrating and unsafe.
The duration your lights can function varies due to the presence of different modes that your light offers, enabling you to calibrate the light’s intensity according to the prevailing conditions and location. However, it’s essential to recognise that higher brightness settings consume more battery power, inevitably reducing the overall runtime.
In recent advancements, certain bike lights feature sophisticated technologies that automatically adapt the light output in correlation with your riding speed. This means that during slower climbs etc, the light output might be dialled down, preserving battery life, while it brightens during faster sections to enhance visibility. For added convenience, select models incorporate indicators that visually represent the remaining battery life or display it as a percentage, providing you with a precise gauge of the battery’s status.
This knowledge empowers you to gauge your ride’s feasibility based on the remaining light run time and make informed decisions about whether to conserve energy or sustain maximum brightness. As such, comprehending the nuanced interplay between light modes, brightness levels, and battery life ensures that your cycling experience remains well-illuminated and secure throughout your journey.

Bicycle Light Modes: Which mode should I use for my journey?
Light technology and battery runtime have evolved considerably, so most lights will offer more than an on or off setting.
Nowadays, most bike lights offer a spectrum of modes, allowing you to customise your light settings to match your riding location and the prevailing conditions. A particularly valuable addition to these modes is the flashing mode, which proves indispensable in bustling environments where your light might easily fade into the visual cacophony of other road users. The flash mode steps in to elevate your visibility, a paramount concern in high-traffic areas. This heightened visibility holds equal importance for both front and rear lights, enhancing your safety by ensuring that you’re noticed by fellow road users.
Most bike lights incorporate diverse flash patterns that help to differentiate you from the crowd of other lights. Among these, the day bright, or daytime running flash modes have gained prevalence. Tailored for use during daylight hours, daytime running lights guarantee your visibility amid traffic or from a distance. This feature is a significant advancement, as it caters to the growing need for enhanced visibility not only during nighttime but also during the day, maximising your safety in a variety of cycling scenarios.
These advanced modes empower you to tailor your bike light’s performance to suit the unique demands of your ride, optimising safety and visibility whether you’re navigating through a bustling urban landscape or embarking on a scenic countryside journey. By understanding and utilising these modes, you can ride confidently in a wide variety of conditions.
How do I charge my bike light?
The realm of light technology has undergone a remarkable evolution, resulting in the widespread integration of rechargeable battery systems in modern bike lights. This innovation allows for seamless and convenient charging experiences. Equipped with rechargeable batteries, these lights can be effortlessly replenished using a USB cable.
Alternatively, some models are designed with the practicality of a USB stick, enabling you to directly plug the light into your laptop or any available USB port. This user-friendly charging capability signifies a departure from the hassle of disposable batteries and signifies a step towards sustainable cycling practices.
With the convenience of multiple charging options, powering up your bike light becomes a simple task, ensuring that you’re always ready for your next ride with an adequately illuminated path ahead.

What are Lumens?
Lumens serve as the industry’s universal metric for quantifying the luminous output of a light source. In essence, it’s a quantifiable measure of the total visible light emitted, as perceived by the human eye.
The correlation is straightforward: the higher the lumen count, the more radiant and brighter your light becomes. However, it’s essential to strike a balance, as the brilliance of your chosen setting comes at a trade-off. As the lumen count increases, the energy consumption proportionally rises, causing a quicker depletion of your battery. This underscores the importance of considering your lighting needs in conjunction with battery longevity.
By gauging the optimal lumen level for your specific riding conditions, you can ensure that your bike light shines brightly when required while also conserving enough battery life to safely illuminate your entire journey.
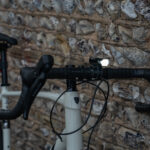
How do I fit my lights to my bike?
The process of fitting lights to your bike offers a range of choices contingent upon the specific light models you opt for. Many lights are equipped with a secure rubber band mount. It’s important to note that these rubber bands are far from your bog standard band; they’re designed to be robust and durable, much thicker than the ones you might use at home. This enables effortless attachment to your bike’s frame or handlebars, ensuring a snug and reliable fit. An added advantage of this type of mount is its simplicity—no tools are required for installation.
Furthermore, the convenience extends to situations where you need to make a stop during your ride. With the rubber band mount, detaching the light is swift and uncomplicated, minimising the risk of someone tampering with or taking your light in your absence.
Others will have an additional bracket. This will be mounted by a bolt or other fixing. When you stop or finish your ride or need to charge your light, it can be removed from the bracket and taken with you.
For cyclists with bikes featuring unique designs like kammtail or aero profiles, specific mounts are often available. These mounts are meticulously engineered to seamlessly integrate with these distinct shapes, maintaining the bike’s aerodynamic efficiency while accommodating the necessary illumination. When selecting lights for bikes with unconventional designs, exploring compatible mount options is crucial for a secure fit that complements both the bike’s aesthetics and functionality.
Some manufacturers also offer integrated solutions, like Trek/Bontrager’s Blendr system which offers a clean and easy solution for installation of lights, computers and other accessories on your bike’s stem.
Ultimately, the method you choose to affix your bike lights depends on your preferences, the lights you select, and the design of your bicycle. The ease and flexibility offered by modern mounting solutions ensure that equipping your bike with the appropriate illumination is a straightforward task, bolstering your safety and visibility during any ride.
Other Frequently Asked Questions About Choosing Bike Lights
Are flashing bike lights legal?
Yes, flashing bike lights are legal, provided they flash between 60-240 times per minute (1-4hz). A flashing light is particularly useful during the day to draw additional attention from other road users. At night, we would recommend you use a constant beam.
How many lumens do I need for a rear bike light?
Anywhere from 50-400 lumens is ideal for a rear bike light. The brighter end of the spectrum is ideal for daytime use, where the extra brightness is needed for visibility. In well-lit, urban areas at night 50-200 lumens works well.
Which bike lights are best?
The best bike lights are those best suited to your specific needs. A mountain biker riding at night is going to need a very different setup to a commuter riding through central London. Brands like Lezyne, Exposure, Cateye (to name just a few), make high-quality lights for a variety of riding.
For some of our top picks, check out our guide “The Best Lights for Cycling“
How bright should your bike lights be?
This would depend on where you are riding and the style of riding you are doing. Mountain biking, for example, requires a higher lumen output to compensate for the lack of street lighting and the need to see the numerous and varied obstacles ahead. Cycling through the centre of London would require a far lower lumen output due to the fact it is an extremely well lit area.
For more info on Lumens, and which range might be most suitable for your preferred riding type, check out our Guide to Lumens
Do I need lights if I only ride during the day?
Legally, you are not required to have lights on your bike during the day. But common sense dictates that being more visible is a sensible idea. A set of daylight running lights will help other road users see you from further away, and is especially important if your preference for cycling gear doesn’t include high-vis/bright colours.
Choosing the Right Bike Lights: A Summary
- There are different beam patterns on bike lights, and which you choose should depend on where/what type of riding you are doing
- The brighter your light, the shorter your run time is likely to be
- Different modes allow you to control the output of your bike lights to suit the length of your journey and the environment you’re riding in
- The higher the Lumen number, the brighter the light will be (which, as mentioned above, will reduce the run time if running at full power)
- Most bike lights now use rechargeable batteries that are charged via a USB cable or stick
- There is a mount available to suit nearly all types of bike setups. Many use a simple rubber band attachment, but you can also find mounts designed specifically for aero setups etc.
If you need any assistance choosing the right lights for you and your bike, then feel free to pop into one of our 12 stores across London & Southeast. The team have a wealth of knowledge and riding experience and will be more than happy to help get you set up.
As an alternative, you can also call or email our Support Team, or utilise the web chat function for help.